Sunday, September 30, 2012

Antique Embroidery Hoop


This is a lovely thing.

So very simple. A well-made hoop, heavy enough in construction to not need fabric binding or alteration to make it fit snugly.

It's amazing that, at it's age, it is still kept it's 'round'.

Because wood shrinks at different rates horizontally and vertically, i.e. with and across the grain, whoever made this understood their material well. It is probably made of "Box" or Linden wood, possibly Scandinavian in origin.

There is absolutely no metal involved. A handmade wood screw still holds the hoop securely to the table top.

The attaching piece allows the hoop to rotate out from the clamp for ease of use.


An absolute pleasure to use.

Friday, September 28, 2012

Addendum

Yee Gods!

I was looking up something else, as always on the computer, and ran across a listing for a clamp pin cushion very like the little one I mentioned in the previous post.

It was for sale at nearly $500.00!

I guess I had better lock it in the safe.  heh

Who would believe such a little tool some husband/father probably made would be worth so much?


Thursday, September 6, 2012

Clamp Pincushion


Isn't this the neatest thing?

I picked this little pincushion/clamp up at an antique store somewhere in Missouri.

It may have been made by the Amish, but it may be something brought from the East Coast and much older. It looks very New England. Maybe dating from the late 1700's - early 1800's?

Somebody made this little jewel. The whole thing is such a pleasing thing to have around.

The wooden clamp was probably turned on a lathe.

The screw is wooden too. I think there was a tool with a small metal bit in it to cut wooden screw threads. I believe I've seen one somewhere. Maybe even in my father's wood shop years and years ago.


What a nice little tweeky knob at the end. Exactly right for finger-tightening.

I keep the wood screw working smoothly with a little beeswax now and then. It seems to be the right thing to use on it.


And it is such a lovely, burnished black finish that only comes from being touched many times by hands.


The fabric on the top is woven; maybe handwoven by some woman. Simple white and blue plad with an overshot zig-zaggy variation pattern....The threads are even but course. I haven't disturbed it and probably never will. There might be other fabric below the top cover. It is sewn on tightly with two kinds of coarse thread.


The stuffing is coarse and springy black and white horsehair. The plow horse's mane? The favorite riding horse's tail strands? A forelock clipped and wound around a finger?

Beneath the stuffing is a small mushroom-shaped, slightly domed small knob.


The clamp has a firm bite to any table edge.

Sewing table?

Quilt frame?


If only it could talk.


Click the photos for a more detailed view.


Friday, August 31, 2012

A Gift

One year my quilt guild exchanged Christmas gifts. The gift I received was this pincushion made by one of my friends who was a member.


She took a small basket, filled it with a styrofoam ball and added batting scraps to cushion it all the way around, then covered it with the cloth piece that looked old-fashioned.

She trimmed it with a heavy gold cord to finish the join between the fabric and the basket edge,

Then she trimmed the rim of the basket with a heavy braid to pick up the gold and repeat it.

The bow mirrors the cream of the trim and makes the whole thing look like an antique.

I would never dream of taking all these elements and putting them together.

Such a simple little thing, but the combination all together looks like a sweet heirloom.


Every time I use it, I think of her.

Sunday, August 26, 2012

Patching a Quilt

You never know when you select a fabric for a quilt if that fabric will 'behave well'. Even if you take all the actions you need to make sure the construction is good, there are some fabrics that just don't hold up as well as the others around it.

Click on photos for a closer look.


This is the case with this quilt.  Re-sewing the seams together on the top side would make the fabrics uneven and drawn. The yellow bordering strips are coming apart at the seams in places. Since it wasn't heavily quilted in the first place, patching it is easy.

So I searched in my reserve pieces and found a yard of this wonderful ikat. The colors all relate to the colors in the quilt. How lucky can you get.

So, in my spare time, (what is that?) I have been cutting custom squares and laying them over the loose seams covering the whole area.

I'm amazed at how the new sections seem to disappear and blend in. This is a 'reckless' quilt, so the new areas fit right in.

Thursday, August 16, 2012

Pear Pincushions

Once, I got a bunch of velvet sample pieces. They were too small to do much with them, but I kept them in a box with some other pieces of fabric.


I also had some scraps of felt and a bag of pure, white sand.

So I made pear pin cushions.

I didn't have a pattern. I just decided how big I wanted them and made a pattern of my own from a piece of paper.

The size of the pin cushions are about the size of a real pear. Except when I drew the pattern, I made the top elongated so that it would form a funnel for the sand.


I sewed the pieces up on the sewing machine, clipped the curves slightly.

I filled the pears with the white sand. I had to pound them on the table top to pack the sand in tightly. I wanted the pear to be jam-packed and really full.

I made the stems out of felt cut in a square with a leaf on top at one end. I rolled the square tightly to make the stem and hand-sewed it down.


I cut another leaf or two to be added to the stem. 


I held the stem in place while I pleated the tops of the pears, folded the fabric over and tucked it in to look like the top of a pear. Then I gathered it around the stem and sewed it all down tightly.


I really like having the sand inside the pincushion because it makes them stand up well and the sand polishes the pins every time they are pushed in and taken out.

Friday, August 10, 2012

The Indigo Top

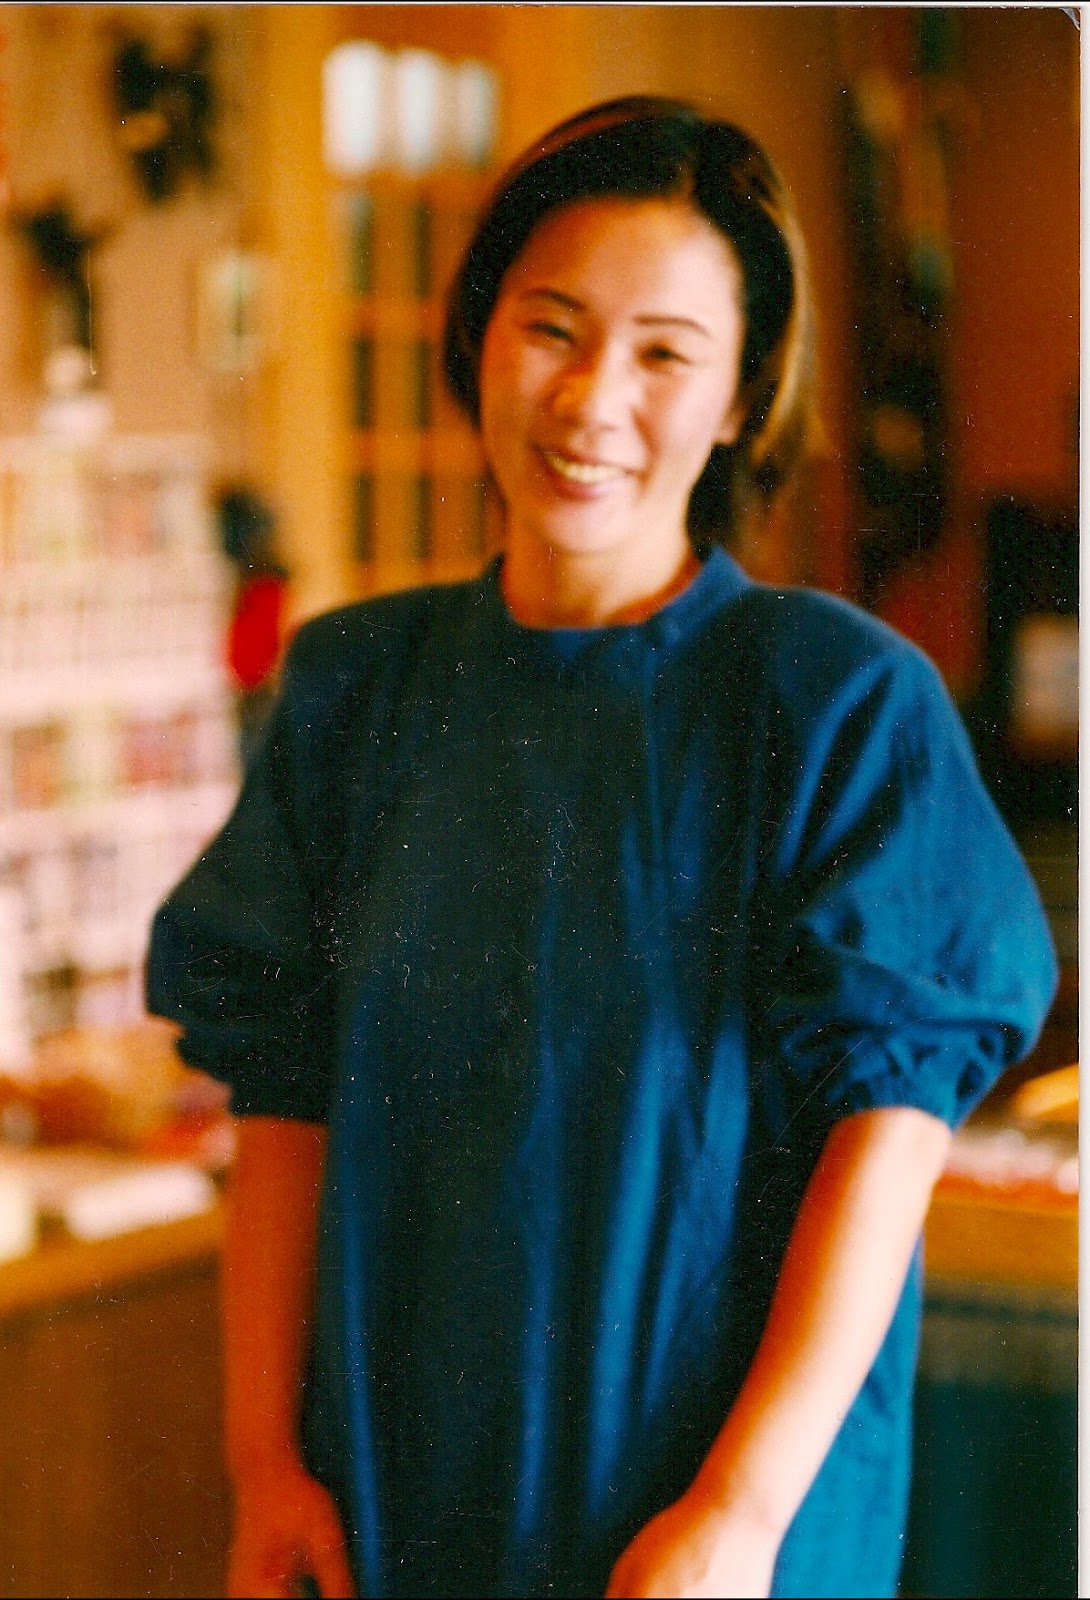
On a trip to Japan, I visited a museum about the production of indigo dye. We were able to try out dyeing our own small piece of fabric and to visit the display of antique pieces used in clothing and the home.

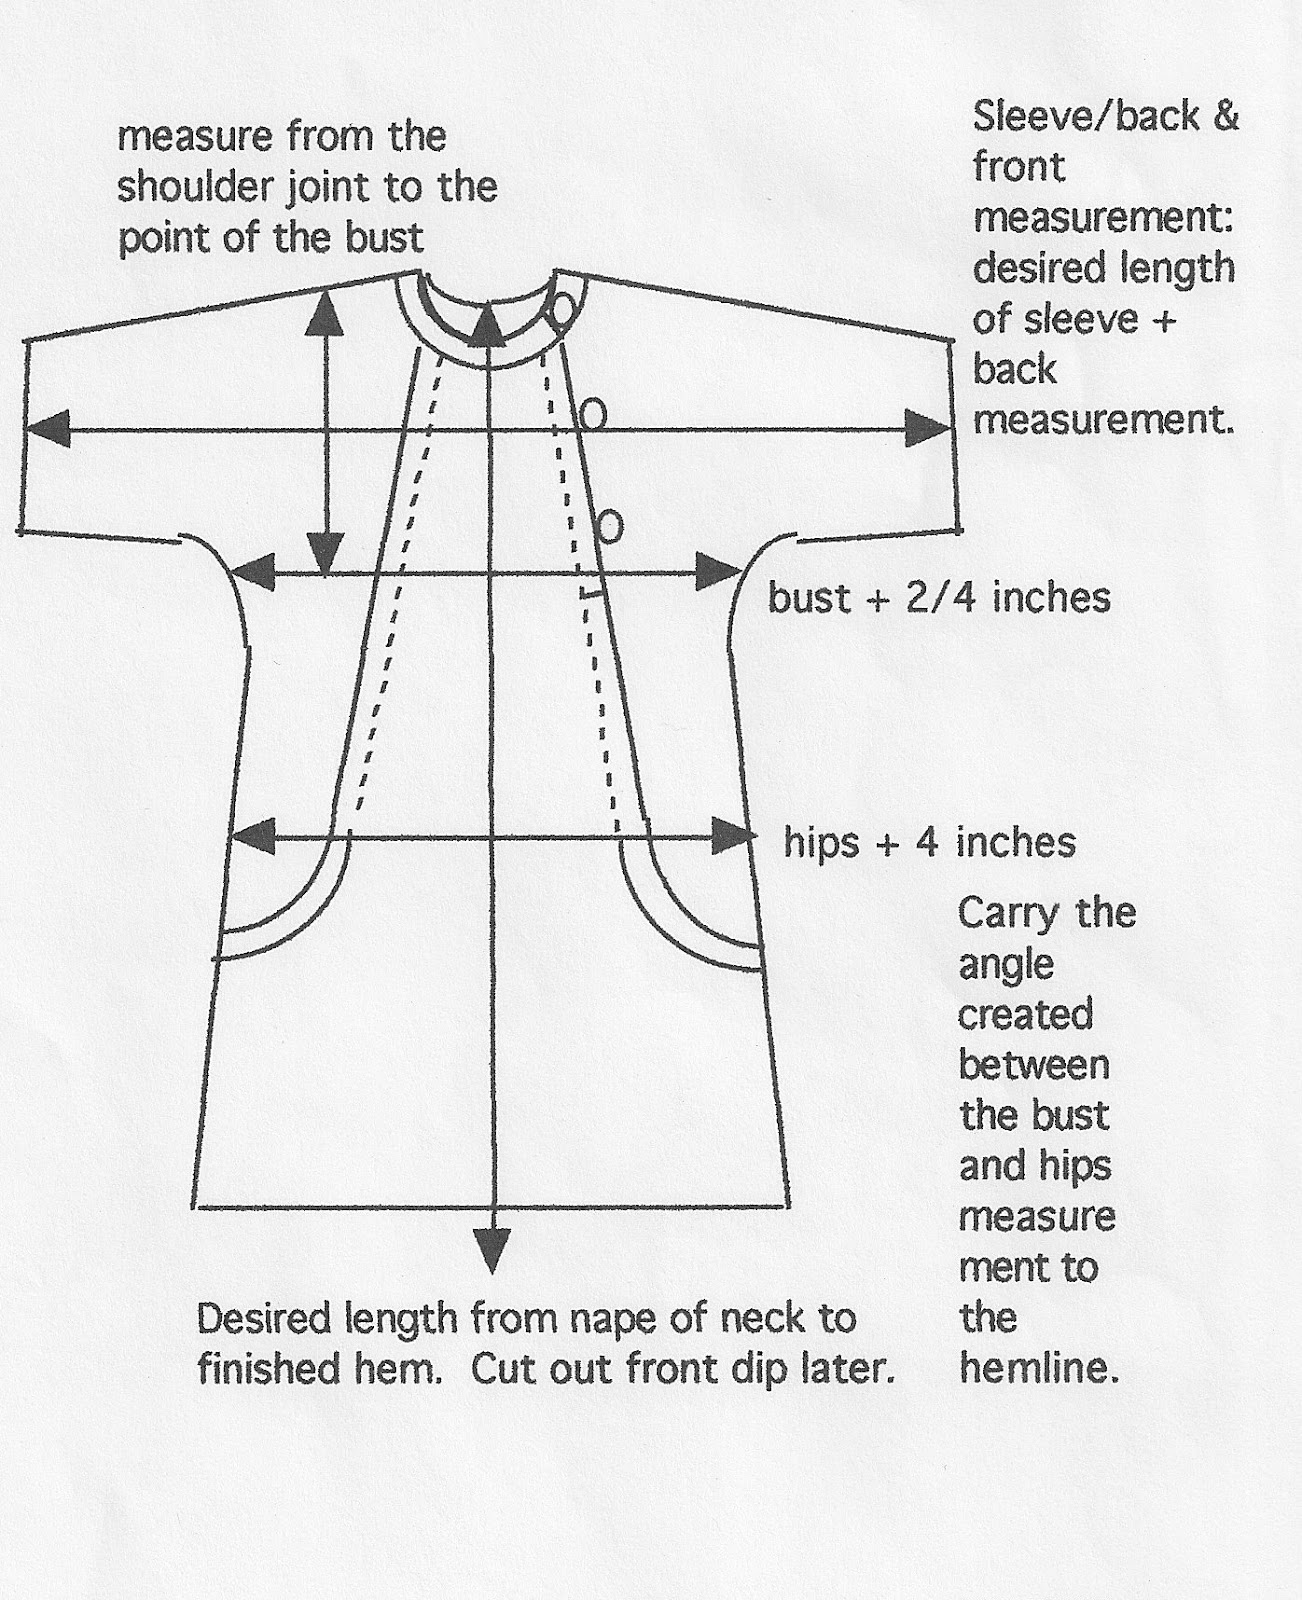
Beside the display and the experience of trying out the dye, I noticed that the guide had on a most interesting shirt.  It was a  beautiful indigo cotton with an unusual pattern. I asked if I could photograph her.  Much later, I used the photo to analyze it and draw a pattern:


This pattern was drawn using a simple little computer program called Super Paint. Too bad it is outdated now. It was great for making black and white drawings.